Menanam kebun sayur dalam wadah tidak jauh berbeda dengan menanam sayur mayur atau kebun dapur di dalam tanah. Persyaratan musiman yang sama juga berlaku – menanam tanaman musim dingin di awal musim semi atau akhir musim panas; menanam tanaman musim panas di musim semi dan musim panas.
Karena ukuran ruang taman kontainer Anda terbatas – termasuk kedalaman tanah untuk pertumbuhan akar – pertama-tama, pilih wadah yang cukup besar untuk tanaman yang ingin Anda tanam, selanjutnya pilih varietas tanaman atau kultivar yang akan tumbuh dengan baik di dalam wadah. Anda akan sukses dengan sayuran yang digambarkan sebagai “kompak”, “semak”, atau “kerdil”.
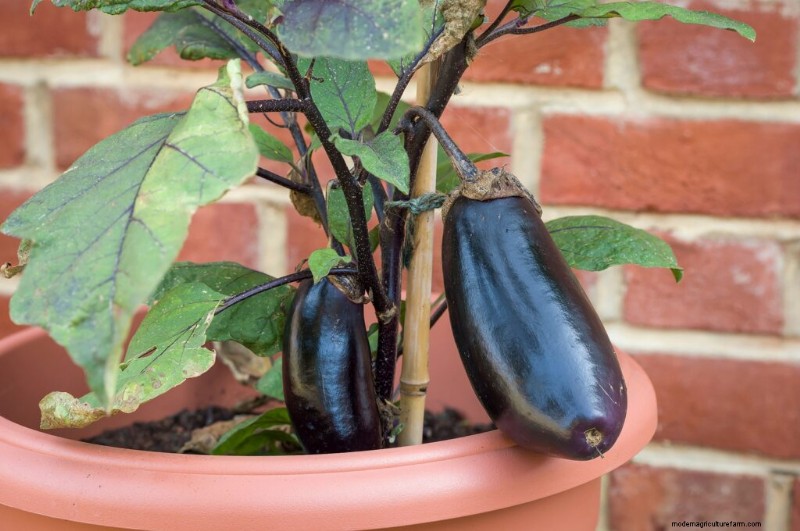
Terong ditanam dalam pot plastik
Keuntungan berkebun dalam kontainer
- Yang Anda perlukan hanyalah sekop, tanah yang sudah dicampur sebelumnya, dan wadah.
- Perawatan lebih mudah:kebun kontainer jarang ditumbuhi gulma; tanah yang sakit mudah terombang-ambing; air hampir selalu dekat karena sebagian besar taman kontainer berada di teras, beranda, atau balkon
- Kontainer bersifat mobile:Anda dapat memanfaatkan sinar matahari dan perubahan musim; tanaman lebih mudah terlindung dari hawa dingin.
- Panen cepat:letakkan wadah Anda di dekat dapur.
- Hampir semua tanaman yang tumbuh di taman dalam tanah akan tumbuh di taman kontainer asalkan wadahnya cukup besar.
Karena kebun kontainer menawarkan begitu banyak kebebasan, tambahkan petualangan dengan menanam varietas gourmet yang tidak biasa Anda temukan di pasar pertanian atau toko hasil bumi. Berikut beberapa sarannya:kacang polong (bulat, gemuk, dan renyah), Mizuna (daun selada berenda), krokot musim dingin (daun sukulen kecil); salad burnet (salad hijau rasanya seperti mentimun), bumbu kemangi (rasanya seperti namanya), kucai bawang putih (pada kentang atau salsa), kacang fava (coba yang segar), bit (bagaimana kalau diaduk merah), tomatillo ungu (cukup dikatakan), paprika manis mini (coba Jingle Bells).
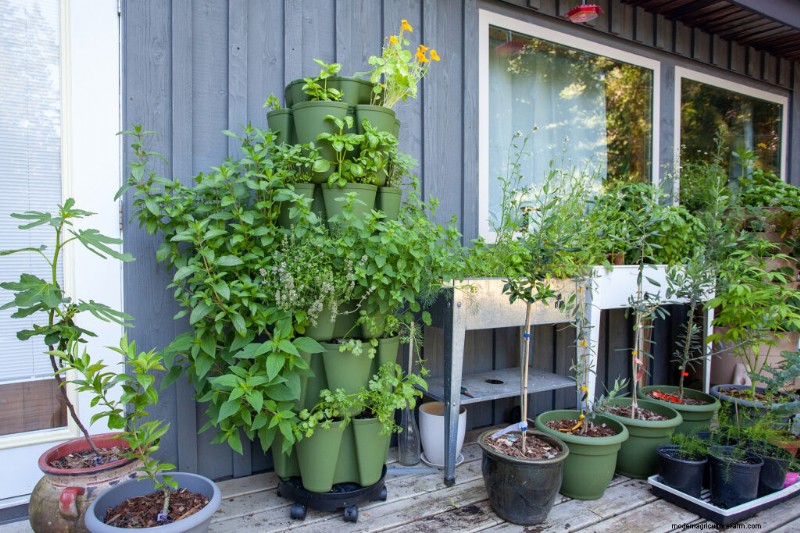
Tumbuh di menara vertikal dan pot di dek
Periksa katalog benih – sebagian besar akan merekomendasikan varietas untuk penanaman dalam wadah. Berikut adalah daftar varietas dan kultivar sayuran dan herba kebun dapur yang dapat Anda coba dan menyarankan ukuran wadah minimum untuk menanam satu tanaman. Jika ingin menanam lebih dari satu tanaman dalam satu wadah tambahkan tiga perempat lagi lebar wadah.
Anda bisa menanam kebun sayur mini. Menanam sayuran dalam wadah adalah cara berkebun yang mudah dan menyenangkan jika Anda tinggal di apartemen, townhouse, atau kondominium. Balkon, teras, halaman, serambi, pintu, atau ambang jendela yang cerah adalah semua yang Anda butuhkan untuk membuat taman kecil Anda tumbuh. Kebanyakan sayuran dan herba dapat disimpan dalam wadah. Faktanya, kemampuan Anda untuk memindahkan wadah dari tempat teduh ke tempat yang terkena sinar matahari dan dari lokasi yang dingin ke lokasi yang hangat hampir menjamin kesuksesan.
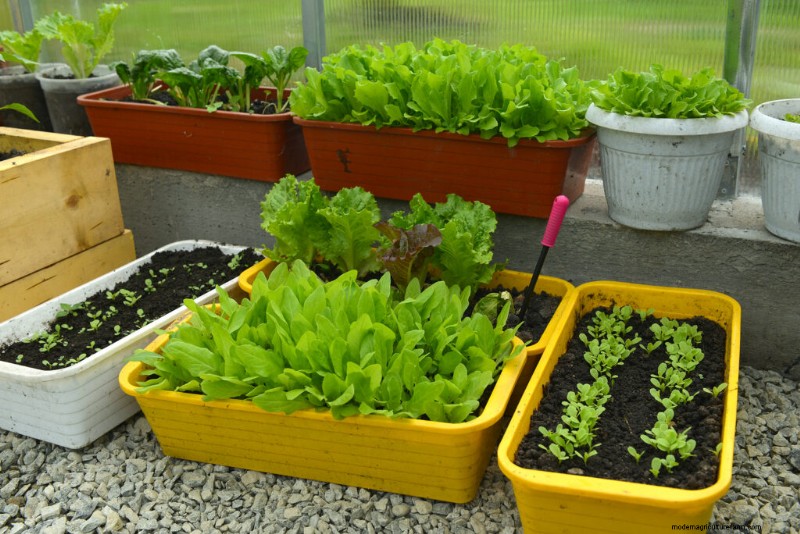
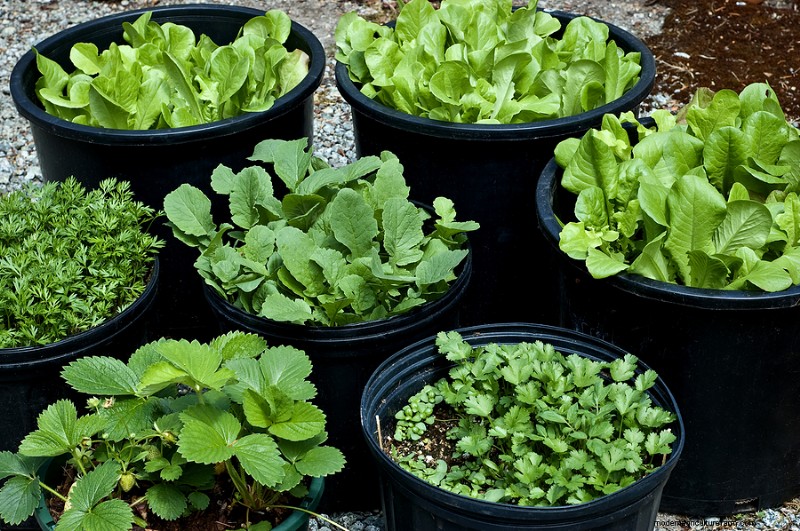
Kotak dan pot dengan selada dan tauge
Memilih wadah
Wadahnya bisa berupa apa saja sesuai keinginan Anda:pot plastik atau tanah liat, kotak jendela plastik atau kayu (kayu merah atau cedar tahan lama dan lambat rusak), bak, keranjang gantang atau kawat, atau tong. Saya bahkan pernah melihat sayuran tumbuh di kaleng penyiram tua dan sepatu taman. Anda dapat berimprovisasi dengan berbagai macam wadah tergantung sayuran apa yang ingin Anda tanam.
Produk Taman Kontainer di Amazon:
- Tas Tumbuh Gardenzen 10-Paket 10 Galon
- Tempat Tidur Beroda untuk Sayuran
- Pekebun yang Menyiram Sendiri untuk Sayuran
- Minuman Serangga Mati Kapten Jack
- Pengendalian Penyakit Tanaman Minyak Harris Neem
Pot plastik ringan dan biasanya murah. Polipropilena cetakan sangat populer – banyak yang terlihat seperti pot tanah liat. (Ini akan lebih melindungi tanah dari dingin daripada plastik tipis.) Pot tanah liat dan terakota lebih mahal tetapi sangat menarik. Tanah liat dan terakota perlu lebih sering disiram jika lapisan plastik tidak digunakan. Pot kaca juga menarik, tetapi periksa kembali apakah pot tersebut memiliki lubang drainase. Kotak kayu, bak, dan setengah tong adalah pilihan yang baik jika cuaca dingin sering terjadi. Pastikan wadah kayu memiliki lubang drainase dan setelah ditanam jangan sampai mengering karena akan retak atau kehilangan bentuknya.

Kubis ditanam di perkebunan plastik
Jenis kontainer
Wadah untuk taman kontainer bisa berupa terakota, kayu, plastik, atau logam. Pilih gaya yang paling sesuai dengan teras, balkon, atau teras atap Anda.
Semakin besar wadahnya, semakin sedikit penyiraman dan pemberian pakan yang dibutuhkan karena wadah yang lebih besar dapat menampung lebih banyak tanah atau media pot, kelembapan, dan nutrisi yang dibutuhkan tanaman. Pot kecil dan kotak jendela kemungkinan besar perlu disiram setiap hari di daerah hangat dan panas. Pot berukuran besar biasanya dapat mempertahankan kelembapan tanah selama tiga hari atau lebih.
Wadah beroda memungkinkan Anda memindahkan tanaman untuk mendapatkan sinar matahari terbaik atau memanfaatkan naungan saat cuaca panas. Plant caddies hadir dalam berbagai model dengan roda dan kastor yang dinilai sesuai dengan bobot yang dapat ditanggungnya.
Drainase yang baik sangat penting saat menanam tanaman dalam wadah. Wadah dengan diameter kurang dari 10 inci/25 cm harus memiliki lubang dengan diameter ½ inci/1,2 cm untuk memberikan drainase yang baik. Wadah dengan diameter lebih dari 10 inci memerlukan dua hingga empat lubang.
Kedalaman tanah minimal 8 inci/20 cm akan menampung cukup tanah, unsur hara, dan kelembapan untuk mendukung hasil yang baik dari hampir setiap sayuran dan herba yang tumbuh dalam wadah. (Harapkan untuk menyiram dua atau tiga kali seminggu.) Wadah yang lebih kecil yang memiliki lebih sedikit tanah mungkin memerlukan penyiraman dan pemupukan lebih sering.
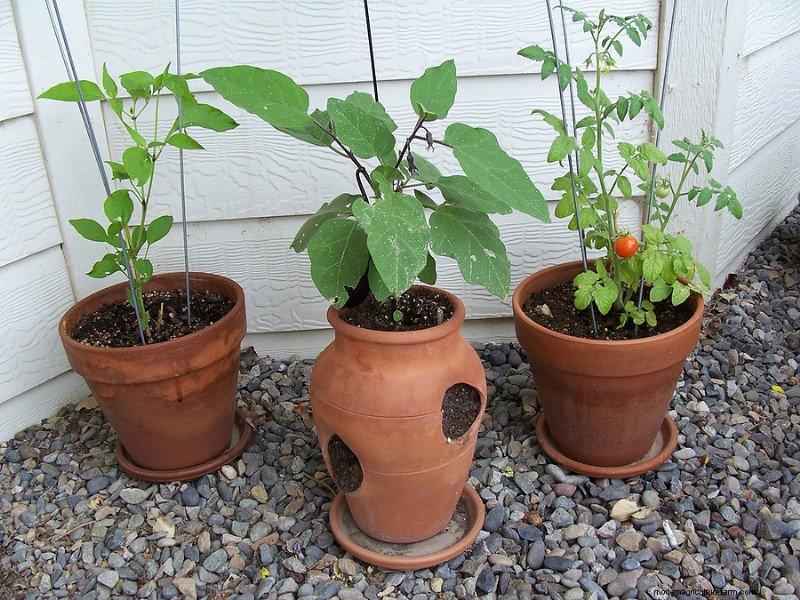
Lada, terong, dan tomat ditanam dalam pot terakota
Secara umum, keseragaman tampilan dan bahan wadah akan menarik secara visual.
- Pot terakota dan kaca dan pekebun telah teruji dan benar serta memiliki nuansa klasik. Terakota berpori dan menarik kelembapan dari tanah. Pot berlapis kaca mempertahankan kelembapan lebih lama. Pot tanah liat dan kaca bisa jadi berat dan sulit dipindahkan tanpa pecah setelah ditanam. Tempat penyimpanan tanaman dapat membantu Anda memindahkan wadah ini.
- Kotak kayu dan setengah tong memiliki penampilan pedesaan. Wadah kayu merah dan cedar tahan terhadap kelembapan dan lambat membusuk—selama beberapa tahun. Wadah kayu dapat menyerap kelembapan sehingga Anda perlu memperhatikan penyiramannya. Menempatkan lapisan plastik dalam wadah kayu akan memperlambat penguapan dan melindungi kayu.
- Baja galvanis memiliki tampilan modern dan tahan korosi. Anda dapat menemukan ember dan bak logam di toko pakan dan toko perangkat keras. Panci logam dapat menahan air dengan baik, tetapi juga cepat panas jika terkena sinar matahari langsung. Lapisi wadah logam dengan lembaran plastik atau kain lanskap agar logam tidak terlalu panas di tanah.
- Pot fiberglass dan resin dan pekebun ringan dan sering kali dibuat agar terlihat seperti terakota atau keramik yang lebih berat.
- Pot plastik —dari pot pembibitan yang paling berwarna hingga yang berwarna hitam—merupakan yang paling murah, ringan, dan tahan lama, serta tersedia dalam berbagai ukuran. Pot plastik ideal jika wadahnya perlu sering dipindahkan. Wadah plastik menahan kelembapan dan membutuhkan lebih sedikit penyiraman. Di daerah musim dingin, Anda dapat membuat pot plastik ganda dengan lapisan lumut sphagnum atau koran di antara pot untuk memberikan insulasi. Di daerah musim panas, Anda bisa mengecat bagian luar pot plastik hitam dengan lateks untuk memantulkan panas matahari.
- Pot fiber —kertas yang diresapi dengan bahan pengikat—kuat, tahan lama, ringan, dan sangat murah. Wadah fiber harus memiliki drainase yang baik dan tidak boleh dimasukkan ke dalam wadah berisi air.
- Wadah yang dapat menyiram sendiri –pekebun dengan reservoir built-in adalah pilihan yang baik untuk taman atap atau balkon. Wadah penyiraman sendiri memiliki bagian atas untuk tanah dan bagian bawah untuk menampung air dengan sistem sumbu untuk mengalirkan air ke dalam tanah. Wadah ini tidak perlu disiram setiap hari dan sangat cocok untuk tanaman yang membutuhkan air seperti tomat, terong, paprika, dan labu.
- Kotak jendela adalah pilihan yang baik di mana ruang terbatas dan sempit. Kotak jendela kayu, terakota, dan plastik mudah ditemukan. Kotak jendela memerlukan kit braket untuk mengamankannya ke kusen dan balkon.
- Keranjang gantung dapat membantu Anda memanfaatkan seluruh ruang vertikal Anda. Setengah keranjang bisa ditempel di dinding. Pilih pengait dan braket yang sesuai dengan berat keranjang gantung yang ditanam dan disiram. Perlu diingat bahwa keranjang gantung karena terkena angin dan sinar matahari umumnya akan cepat kering.
- Menanam kantong adalah tas kain ringan dan fleksibel yang dapat dimasukkan ke hampir semua ruang. Kantong tumbuh biasanya dilapisi dengan plastik dan mempertahankan kelembapan. Mereka mudah dipindahkan dan disimpan setelah kosong. Sisi-sisi kantong dapat digulung ke atas dan ke bawah untuk jumlah tanah yang berbeda-beda—tergantung pada tanaman yang Anda tanam.
- Kontainer dengan dasar lebar dan palung adalah pilihan yang baik untuk balkon dan taman atap karena pusat gravitasinya rendah dan kecil kemungkinannya untuk tertiup angin atau tergeser oleh angin.
- Tempat tidur mini yang ringan dapat digunakan di teras, balkon, dan teras atap. Tanaman ini memerlukan lapisan dasar dari bahan lanskap untuk menjaga agar tanah dan kelembapan tidak masuk ke permukaan dan harus ditempatkan untuk drainase yang optimal.
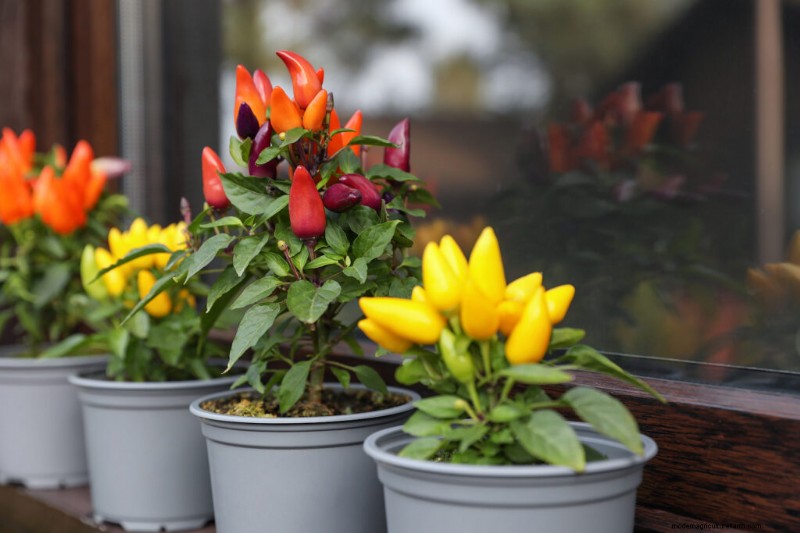
Paprika ditanam dalam pot plastik berukuran 3 galon
Ukuran wadah
Pilihan terbaik Anda adalah memilih wadah sebesar mungkin. Kacang, mentimun, paprika hijau, dan tomat membutuhkan wadah berukuran lima galon (varietas kerdil dapat bertahan dalam pot berukuran dua galon). Lobak, selada, daun bawang, selada, peterseli, wortel, daun bawang, dan herba lainnya tumbuh subur dalam wadah dengan kedalaman enam inci dan lebar sekitar enam inci. Satu sayuran kecil seperti selada atau bayam akan tumbuh dalam pot berukuran enam inci. Pot berukuran 12 inci akan menampung empat tanaman selada atau bayam. Panci berukuran 18 inci dapat menampung sepuluh herba. Hindari wadah yang dangkal karena dapat membuat akar menjadi sempit dan dapat cepat kering atau tergenang air. Lubangi bagian dasar wadah apa pun agar kelebihan air dapat terkuras habis. Jika Anda menggunakan wadah yang sudah pernah digunakan sebelumnya, pastikan untuk mencucinya hingga bersih sebelum ditanam.
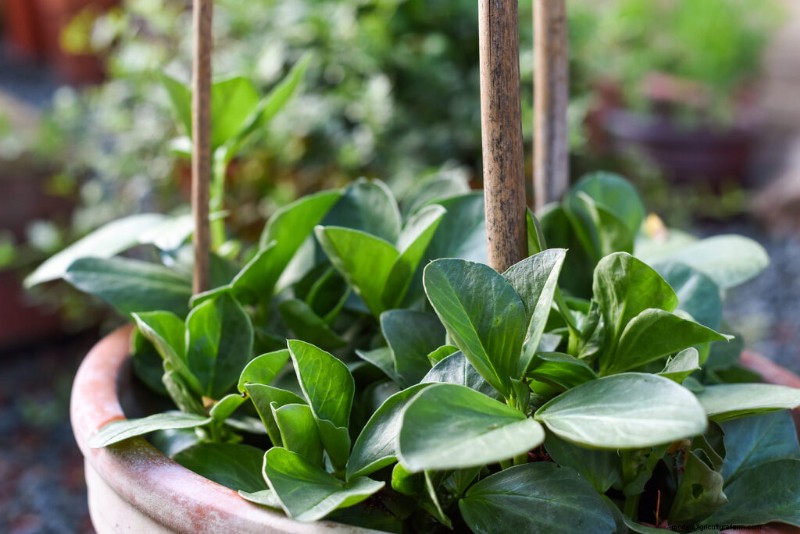
Tanaman berdaun dalam wadah kecil
Campuran tanah untuk wadah
Membeli tanah pot yang sudah dicampur sebelumnya adalah cara termudah untuk mengisi wadah Anda. Campuran pot dalam kantong tersedia dalam beberapa ukuran. Pusat taman dan sebagian besar toko perangkat keras menjual campuran pot – yang biasanya berupa tanah serbaguna atau kompos. Jika Anda memiliki tanah yang tumbuh dengan baik di kebun Anda, Anda dapat menggunakannya:tambahkan kompos tua dengan perbandingan yang sama, tanah lapisan atas yang dihaluskan, dan kombinasi coran cacing, ampas kopi bekas, dan perlit untuk membuat campuran Anda sendiri. (Tanah dari kebun saja hampir selalu terlalu padat untuk tanaman kontainer tumbuh.)
Tempatkan selapis gambut atau kulit kayu yang sudah disterilkan di dasar wadah di atas lubang drainase agar campuran pot Anda tidak luntur. Selanjutnya, tambahkan selapis kompos dan kemudian campuran pot. Tempatkan wadah besar – seperti bak dan setengah tong – pada posisi akhirnya sebelum mengisinya dengan tanah. Jika Anda berencana untuk memindahkan kontainer besar sepanjang tahun, letakkan kontainer tersebut di atas roda atau roller. Isi wadah hingga 1 inci (2,5 cm) dari atasnya.
Tanah menyalurkan nutrisi dan air ke akar tanaman dan mengikat tanaman pada tempatnya. Karena media tanam dalam wadah terbatas, komposisinya sangat penting bagi tanaman yang tumbuh di sana.
Campuran wadah tanam harus kaya nutrisi dan menahan kelembapan selama beberapa hari. Itu harus lunak dan rapuh serta tahan terhadap pemadatan agar akar dapat berkembang dengan baik. Campuran pot harus bebas dari patogen jamur yang ditularkan melalui tanah dan hama predator seperti belatung, cacing gelang, dan larva yang dapat merusak tanaman.
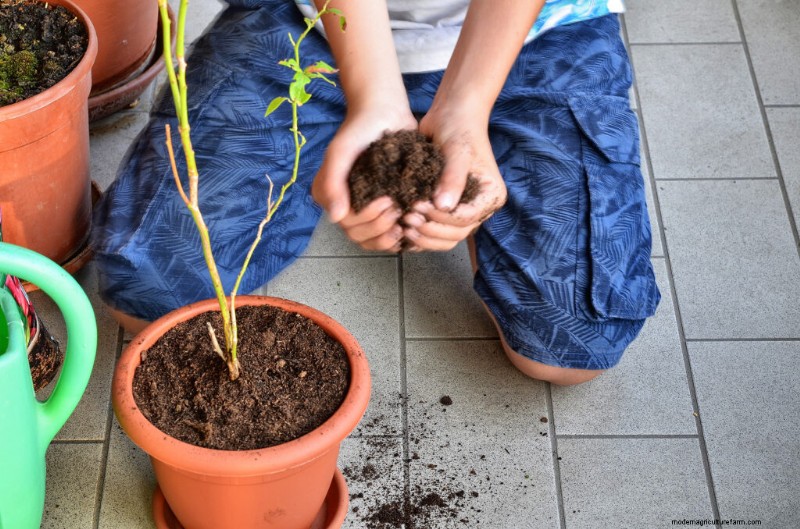
Menambahkan tanah ke dalam pot untuk menanam blueberry
Umumnya, tanah di halaman belakang tidak cocok untuk penanaman dalam wadah. Meskipun tanah di halaman belakang mungkin subur, namun sering kali mengandung terlalu banyak tanah liat atau terlalu banyak pasir atau bisa juga terlalu asam atau terlalu basa. Konsentrasi seperti itu dalam ruang wadah yang terbatas dapat mengganggu pertumbuhan tanaman.
Untuk memastikan perkembangan tanaman yang sehat, cara terbaik adalah membeli campuran tanam untuk wadah penanaman atau meraciknya sendiri. Ada banyak campuran pot bermerek yang tersedia di pusat taman dan pembibitan. Tanyakan kepada petugas penitipan anak Anda apa yang dia rekomendasikan. Dua campuran cahaya komersial yang cocok untuk balkon dan taman atap adalah Supersoil dan Jiffy Mix. Campuran pot komersial lainnya adalah Pro Mix dan Redi-earth.
Memadukan campuran pot Anda sendiri merupakan alternatif dibandingkan membeli campuran yang sudah jadi. Membuat campuran sendiri mungkin hemat biaya jika Anda memerlukan campuran pot dalam jumlah besar—dan jika Anda memiliki tempat untuk menyimpannya.
Berikut tiga campuran pot yang bisa Anda campurkan di rumah:
Campuran Pot Universitas Cornell:
Berikut adalah campuran pot yang dikembangkan oleh Cornell University (formula ini menghasilkan campuran yang cukup untuk sekitar tiga hingga empat wadah berukuran 1 galon (4L)):
- 8 liter (7,5 L) vermikulit
- 8 liter (7,5 L) lumut gambut yang diparut (catatan:lumut gambut adalah sumber daya tak terbarukan; pengganti kompos tua)
- 2 sendok makan superfosfat
- 2 sendok makan batu kapur
- 8 sendok makan tepung tulang kukus atau kotoran sapi kering
Campur semua bahan ke dalam tempat sampah yang dilapisi dengan pelapis kaleng. Kocok dengan kuat. Ini adalah campuran yang tidak berbau dan apa yang tidak Anda gunakan dapat disimpan dalam kantong plastik.
Campuran pot Universitas California:
Berikut campuran media pot yang dikembangkan oleh University of California (rumus ini menghasilkan satu yard kubik atau 27 kaki kubik (0,76 cm) campuran tanam yang setara dengan 202 galon (765L)):
- 13 kaki kubik (0,36 cbm) serbuk gergaji kayu merah yang dikomposkan
- 7 kaki kubik (0,2 cbm) pohon cemara atau kulit pinus
- 3½ kaki kubik lumut gambut sphagnum kasar (catatan:lumut gambut adalah sumber daya tak terbarukan; pengganti kompos tua)
- 3½ kaki kubik pasir hortikultura atau pasir bangunan tajam
- Untuk 1 yard kubik (0,02 cbm) bahan-bahan ini tambahkan:
- 5 pon (2,2 kg) pasir dolomit
- 2 pon (0,9 kg) pupuk superfosfat
- 1 pon (0,45 kg) kalsium nitrat
Campuran pot sayuran buatan rumah:
Campuran ini cukup untuk satu wadah berukuran 10 galon (38L) (untuk jumlah yang lebih besar, tambah bahan secara proporsional):
- 5 galon (19 L) kompos yang sudah matang (baik yang dibuat secara komersial atau buatan sendiri)
- 1 galon (4L) pasir tajam
- 1 galon (4L) vermikulit atau perlit
- 1 galon (4L) sphagnum gambut paling banyak
Haluskan bahan-bahan tersebut lalu tambahkan 1 cangkir (236 mL) pupuk chelated 5-10-10 lalu haluskan kembali.
Campuran pot yang dicampur secara komersial hadir untuk Anda dalam keadaan steril. Campuran rumahan yang mengandung tanah kebun atau kompos buatan sendiri tidak. Anda mungkin ingin mensterilkan campuran Anda untuk menghancurkan benih gulma dan nematoda (cacing mikroskopis kecil) dan untuk menetralisir penyakit jamur. Anda dapat mensterilkan campuran dengan menyebarkannya dalam loyang dangkal dan memanggangnya pada suhu 135°C (275°F) selama satu jam; rendam tanah sebelum dipanggang untuk menghindari bau.
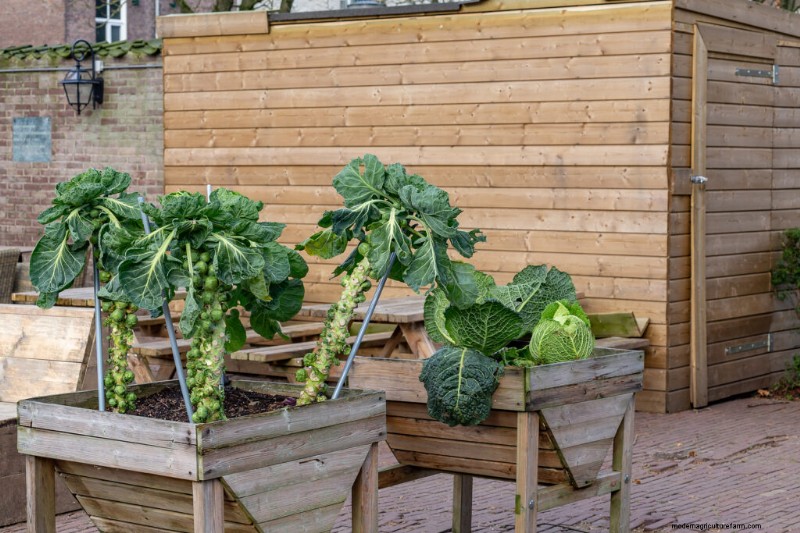
Kecambah Brussels dan kubis hijau tumbuh di kotak kayu
Taliuntuk kontainer
Pilih sayuran padat, kerdil, atau cepat matang untuk taman kontainer Anda. Sayuran berdaun seperti selada, bayam, lobak, daun bawang, dan kubis dapat tumbuh subur hanya dengan lima jam sinar matahari setiap hari. Sayuran umbi-umbian seperti lobak, wortel, dan bit membutuhkan satu atau dua jam lagi. Sayuran yang berbuah paling banyak membutuhkan sinar matahari dan kehangatan; mentimun, terong, paprika, dan tomat membutuhkan setidaknya 8 jam sinar matahari penuh setiap hari. Hal yang sama juga berlaku pada kacang-kacangan. Tanaman tomat, paprika, dan kubis sangat direkomendasikan untuk pemula. Herbal mudah ditanam dalam wadah:cobalah kucai, peterseli, basil, dill, rosemary, sage, gurih musim panas, tarragon, dan marjoram manis.
Benih Sukses di Amazon:
- 55 Varietas Benih Sayuran Pusaka
- 32 Paket Variasi Benih Makanan Perlengkapan Bertahan Hidup | Non-transgenik
- Perlengkapan Pemula Benih 60 Sel dengan Lampu Tumbuh
- Tikar Panas Bibit Tahan Air Tahan Lama
Carilah sayuran yang secara khusus direkomendasikan untuk berkebun dalam wadah–ini adalah varietas sayuran kompak atau kerdil seperti bit Little Ball, wortel Short 'n Sweet dan Little Finger, selada Tom Thumb dan Salad Bowl, serta tomat Tiny Tim atau Pixie.
Berkebun kontainer adalah cara yang baik untuk mempraktikkan berkebun vertikal. Mentimun, buncis, kacang polong, dan tomat bisa dilatih di atas teralis. Tempatkan teralis di wadah Anda sebelum Anda mengisinya dengan tanah dan tanaman. Pilih wadah yang lebih besar dengan alas yang lebar untuk menghindari terjungkal saat tanaman merambat mencapai kematangan.
Varietas sayuran untuk ditanam dalam wadah
Nama varietas sayuran diikuti dengan ukuran wadah yang disarankan.
- Artichoke :Bola Hijau, Bintang Kekaisaran, Violetto; wadah sedalam 24″.
- Kacang lima: Bayi Semak, Bush Lima, Fordhook, Fordhook 242; wadah dengan lebar 12″ x kedalaman 8-10″.
- Kacang jepret: Bush Blue Lake, Bush Romano, Pesaing, Penyedia, Rushmore, Tendercrop Stringless; wadah 1′ lebar x 1′ dalam.
- Bit: Pengalengan Bayi, Burpee Golden, Bola Kecil, Hibrida Ace Merah, Ratu Ruby; wadah dengan lebar 6″ x kedalaman 6-12″.
- Brokoli: Arcadia, Komet Hijau, Munchkin, Keajaiban Kecil; wadah dengan lebar 8-12″ x kedalaman 20″.
- Kecambah Brussel: Salib Giok, Oliver, Rubine; wadah dengan lebar 12″ x kedalaman 18-20″.
- Kubis: Kepala Bayi, Morden Kurcaci, Earliball, Bola Cepat, Flash, Minicole; wadah dengan lebar 8-12″ x kedalaman 1′.
- Wortel: Amini, Baby Fingers Nantes, Baby Spike, Best of the Bunch, Danver's Half Long, Early Horn, Gold Nugget, Kinko, Nantes Half Long, Little Finger, Round Baby, Short &Sweet, Thumbelina, Tiny Sweet; wadah dengan lebar 10″ x kedalaman 10″.
- Kembang kol: Salib Salju, Ratu Violet; wadah dengan lebar 18″ x kedalaman 2-3′.
- Seledri: Conquistador, Bola Salju Awal, Redventure, Ventura; wadah dengan lebar 8-10″ x kedalaman 10″.
- Chard: Lampu Terang, Fordhook, Fordhook Giant, Lucullus, Ruby Red; wadah berukuran lebar 12-18″ x dalam 1′.
- Kubis Cina: Bok Choy, Michihli, Wong Bok; wadah dengan lebar 1′ x kedalaman 20″.
- Collard:Variasi apa saja; wadah sedalam 12″.
- Jagung:F-M Cross, Golden Bantam, Kandy Korn, Luther Hill, Dewasa sebelum waktunya; wadah dengan lebar 3′ x 1′ dalam; 3 per wadah untuk memastikan penyerbukan.
- Selada: Cress Keriting, Cress Dataran Tinggi; wadah dengan lebar 8″ x kedalaman 6-8″.
- Mentimun: Burpee Hybrid II, Burpee Pickler, Bush Baby, Bush Champion, Bush Crop, Bush Pickle, Fanfare, Patio Pik, Pickalot, Picklebush, Pot Luck, Salad Bush, Spacemaster. Pengawetan:Serangan Keberuntungan; wadah dengan lebar 1′ x kedalaman 16″.
- Bunga yang Dapat Dimakan: Tombol Sarjana, Calendula, Dianthus, Marigold, Nasturtium, Bunga Matahari, Viola; wadah
- Terong: Bambino, Si Cantik Hitam, Kehitaman, Telur Paskah, Pasar Florida, Long Tom, Jutawan, Morden Cebol; wadah dengan kedalaman 16″ x kedalaman 18″.
- Endif: Bianca Riccia, Nataly, Neos; wadah sedalam 8-10″.
- Herbal: Basil, Borage, Chamomile, Kucai, Ketumbar, Dill, Adas, Hisop, Serai, Lemon Verbena, Marjoram, Mint, Oregano, Rosemary, Sage, Gurih, Shiso, Tarragon, Thyme; wadah sedalam 8-10″.
- Lobak: Maliner Kren; wadah bak 5 galon – kedalaman 3′.
- Kangkung :Variasi apa pun; wadah dengan lebar 8″ x kedalaman 8″.
- Kohlrabi: Adipati Agung; wadah sedalam 12″.
- Daun bawang: Raja Richard, Lincoln; wadah sedalam 10-12″.
- Selada: Simpson Biji Hitam, Buttercrunch, Cos, Es Hijau, Daun Longgar Hijau, Permata Kecil, Mignonette, Layar Merah Daun Oak, Api Merah, Daun Longgar Merah, Mangkuk Salad, Tom Thumb; wadah dengan lebar 8″ x kedalaman 6-8″.
- Mustard: Gelombang Hijau, Osaka Ungu, Raksasa Merah; wadah sedalam 8-12″.
- Bawang: Jenis tandan:Tandan Beltsville, Pengawetan Gumpalan Kristal, Tandan Jepang, Tandan Putih, Pir Putih. Standar:Kopra, Early Yellow Globe, South Redport; wadah sedalam 10-12″.
- Peterseli: Lumut Gelap Meringkuk, Yang Terpenting; wadah sedalam 8″.
- Kacang polong: Bantam Biru Burpee, Teras Awal, Kemajuan Laxton, Keajaiban Kecil, Gula Meleleh, Burung Salju, Sugar Ann, Sugar Bon, Sugar Daddy, Sugar Mel, Sugar Rae. Kacang Polong:Sayang Kecil; wadah 1′ dalam x lebar 1′.
- Paprika: Semua varietas:Canapé, Jalapeno, Jingle Bells, Keystone, Peppery Pot, Pimento, Raksasa Tahan, Red Cherry, Yolo Wonder; wadah dengan kedalaman 16″ x kedalaman 18″.
- Kentang: Charlotte, Tukang Sepatu, Irlandia, Epicure, Kennebec, Red Pontiac, Rose Finn Apple, Pisang Rusia, Yukon Gold; wadah
- Labu: Hibrida Emas Musim Gugur, Baby Boo, Baby Bear, Bushkin, Jack Be Little, Gula Kecil, Sweetie Pie; wadah sedalam 24″.
- Radicchio: Chioggia Merah Preco, Fiero, Indigo, Pall de Fuoco Rossa; Daikon; wadah dengan lebar 8″ x kedalaman 6-8″.
- Lobak: Burpee White, Juara, Cherry Belle, Komet, Icicle, Early Scarlet Globe, Sarapan Prancis, Red Boy, Sparkler; wadah dengan lebar 5″ x kedalaman 4-6 inci.
- Bayam: Variasi apa saja:American Viking, Long Standing Bloomsdale, Melody; wadah dengan lebar 6-8″ x kedalaman 4-6″.
- Labu musim panas: Crookneck, Awal Musim Panas Kuning, Eightball, Gold Rush, Goldberg, Park's Creamy Hybrid, Peter Pan Scalloping, Pic-N-Pic Hybrid, Richgreen Hybrid, Straightneck, Sunburst, Zephyr; wadah sedalam 24″.
- Labu musim dingin: Butterbush, Bush Acorn, Bush Delicata, Bush Table, Cream of the Crop, Table King, Queen Heart of Gold; wadah sedalam 24″.
- Stroberi: Alpen, Sarian, Tristar; wadah sedalam 8-12″.
- Ubi jalar: Beauregard, Georgia Jet, Vardaman; wadah 20 galon.
- Tomat :Pak Keranjang, Pilihan Wadah, Kegembiraan Tukang Kebun, Emas Husky, Merah Husky, Kotak Makan Siang, Micro-Tom, Patio VF, Pixie, Ceri Merah, Rutgers, Saladette, VFN Goreng Kecil, Raksasa Musim Semi, Sundrop, Super Bush, Sweet 100, Tiny Tim, Toy Boy, Tumbling Tom, Yellow Canary, Yellow Pear, Whippersnapper; kultivar kerdil kontainer:lebar 6-8″ x kedalaman 1′, kultivar standar:lebar 2′ x kedalaman 2-3′.
- Lobak: Hakurei, Bola Putih Atas Ungu; wadah dengan lebar 10-12″ x kedalaman 12″.
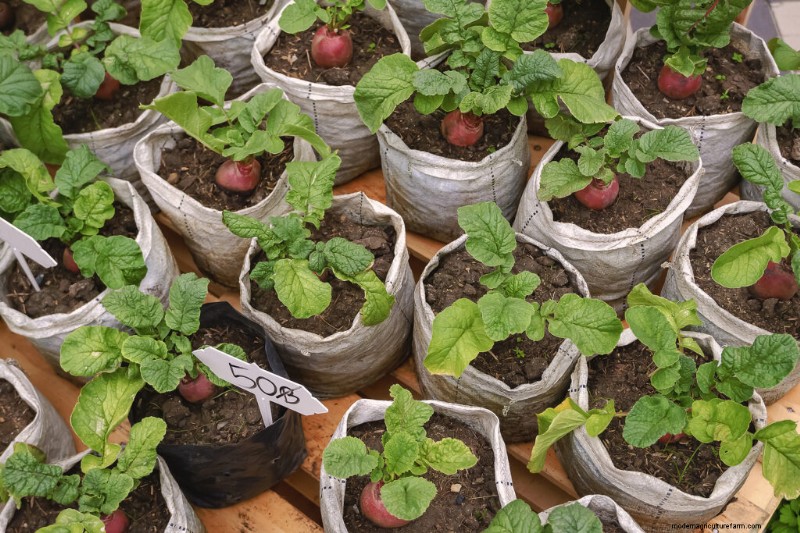
Bit tumbuh di kantong tanam
Varietas sayuran kerdil dan mini
Sayuran mini, kerdil, dan kerdil adalah pilihan yang baik untuk ditanam dalam wadah. Varietas kerdil sejati pada saat matang penuh memiliki bagian yang dapat dimakan yang ukurannya lebih kecil dibandingkan varietas sayuran dan kultivar biasa. Miniatur, kerdil, dan kerdil berbeda dengan sayuran yang dijual sebagai sayuran “bayi” – sayuran ini umumnya merupakan kultivar berukuran penuh yang dipetik sebelum matang. Jagung bayi, misalnya, paling sering merupakan jagung biasa yang dipanen lebih awal setelah sutranya muncul dari kulitnya.
Kurcaci dan miniatur memerlukan sedikit ruang tumbuh di atas tanah dan sangat cocok untuk wadah. Namun karena tanaman dan buahnya lebih kecil, tanaman ini tidak dapat diharapkan dapat berfungsi di dapur atau dijadikan varietas berukuran penuh. Pertimbangkan kurcaci dan cebol untuk lauk pauk atau tumisan.
Sedangkan untuk menanam sayuran mini, selain jarak tanam dan sering kali panen awal, praktik penanaman normal juga berlaku. Sayuran mini memiliki kebutuhan tanah, air, nutrisi, dan cahaya yang sama dengan varietas biasa.
M variasi sayuran awal | Hari-hari untuk memanen | D deskripsi | KACANG Kontainer 5 galon, terpisah 10″ Dwarf Bees 80 pelari berukuran 18 hingga 24 inci Thorogreen 68 tinggi 18 inci Lima
BEETS Jarak dua hingga 3 inci Burpee’s Gold Beet 55 diameter 1 inci
wadah 5 galon, 3 tanaman per 54 Ukuran bola golf Spinel 52 Chioggia bulat 1½ inci 55 Pusaka Italia
KUPI Kontainer 5 galon per tanaman Kepala Bayi 72 kepala 2½ inci Kepala Kurcaci Modern 65 kepala 4 inci
BELAWAH Gladiator Early Sugar Cebol 60 Medium vine Midget Muskmelon 60 3-foot vines Minnesota Midget 63 4-inch melons Short ‘n Sweet 62 Bushy
WORTEL Jarak satu hingga 2 inci Bunny Bite 65 1½ inci akar Kelingking 65 Silinder Pendek ‘n Manis 68 Akar lancip 4 inci Thumbelina 60 Seukuran gigitan Tiny Sweet 65 Akar 3 inci
JAGUNG Kontainer 5 galon, terpisah 15″ Baby Asian 65 telinga 4-5 inci Faribo Golden Midget 60 tanaman berukuran 30 inci Golden Midget 60 tangkai setinggi 2 hingga 3 kaki Golden Miniature 54 telinga 5 inci
MENITUN Wadah 5 galon, terpisah 15″ Baby Cucumber 52 Rambut lebat, awal Bush Whopper 55 Tanpa pelari Little Minnie 52 Semak setinggi 2 kaki Midget 50 tanaman merambat setinggi 2 kaki, awal Patio Pik 55 Pengiris untuk keranjang Pot Luck 56 Tanaman berukuran 18 hingga 24 inci
TERUNG Buah dengan panjang 6 hingga 8 inci Telur Hitam Awal 65 Buah berukuran 5 inci, Telur Paskah yang lembut 65 panjang 2-3 inci Little Fingers 68 Bush, buah paling awal Morden Midget 65
wadah 5 galon per tanaman Nagaoka New Kissin 65 Buah berukuran 4 inci, awal Putih Hias 60 Buah awal berukuran 2 inci Acar Ungu 70 Terong kecil Slim Jim 65 Acar, sangat kecil
SELUR Jarak empat hingga 10 inci Cebol 55 Buttercrunch Sweet Cebol Cos Tinggi 60 5 inci, tegak Tom Thumb 65 Ukuran bola tenis, Buttercrunch
BAWANG Jarak dua hingga tiga inci Barletta 70 Acar kecil dan bulat Quicksilver 70 Mutiara kecil Silver Queen 70 Mutiara kecil
PEAS Jarak dua inci American Wonder 61 tanaman berukuran 12 inci, awal Kemajuan Lebih Besar 62 tanaman merambat berukuran 18 inci
KENTANG Jarak antara enam hingga 8 inci Ladyfinger 80 panjang 4 hingga 5 inci
LEMAK Pilih buah yang berukuran sebesar bola golf dan berukuran kecil Jack-Be-Little 90 3 inci di sepanjang Mini-Jack 90 3 hingga 4 inci buah Wee-B-Little 85 2 hingga 4 inci buah SQUASH-SUMMER Jarak dua belas hingga 20 inci Benning’s Green Tint 50 Scallop squash Cousa 50 Lebanese, 4 inci panjang
SQUASH-MUSIM DINGIN Jaraknya dua belas hingga 20 inci Jersey Golden Acorn 50
kontainer 5 galon per tanaman TOMAT Kontainer 5 galon, terpisah 12″ Tetesan 65 Salad Awal yang Tegas dan Berlimpah 45 6 hingga 8 inci Teras 70 15 hingga 30 inci, awal Pixie 50 tanaman anggur 24 inci Presto 60 Musim panjang, awal Teras Cantik 70 30 inci, berlimpah Red Cushion 65 18 inci, cherry Salad Top 50 18 inci tinggi Small Fry 60 Pemangkas berat, semak awal Stoke’s Alaska 55 18 inci, tanaman merambat awal Tiny Tim 50 15 inci, tinggi Toy Boy awal 60 2 kaki, tanaman merambat awal Tumblin’ Tom 55 20 hingga 24 inci
SEMBUR Wadah 5 galon, terpisah 12″ Burpee Sugar Bush 80 6-8 pon Kegembiraan Keluarga 88 Agak lonjong Golden Midget 658 inci bulat Lollipop 70 3-5 pon Market Midget 69 3-5 pon manis New New Hampshire Midget diameter 68 7 inci musim pendek Petite Sweet 658 pon ekstra gula Sugar Baby diameter 808 inci Manis Gula Bola 65 12-15 pon, multi-buah Sugar Doll 72 8-10 pon, manis Sugar Lumps 78 8-9 inci diameternya Yellow Doll 68 3-5 pon You Sweet Thing 70 12-13 pon, bulat, bergaris
Menjarak tanaman dalam wadah
Memberi tanaman sayuran ruang yang dibutuhkan untuk tumbuh dewasa sangatlah penting. Jarak tanam yang tepat memastikan akar tidak bersaing untuk mendapatkan kelembapan dan nutrisi, serta pertumbuhan di atas tanah tidak padat dan memerlukan paparan cahaya serta sirkulasi udara yang baik (penting untuk mencegah penyakit).
Tanaman berdaun dan umbi-umbian dapat ditanam di dalam wadah dengan menyebarkan benih, tetapi setelah tanaman telah tumbuh setinggi 2,5-5 cm (2,5-5 cm), tanaman tersebut harus ditipiskan. Tanaman buah-buahan—seperti tomat dan paprika—sebaiknya ditanam di pot kecil berukuran 7-10 cm (3 atau 4 inci) dan kemudian dipindahkan ke wadah yang lebih besar.
Jarak minimum yang disarankan antara tanaman yang tumbuh hingga dewasa di dalam wadah:
- Artichoke: Tanam sendiri-sendiri; 10 galon (38L) tanah per tanaman
- Kacang: Dengan jarak 3-9 inci (7,5-23 cm)
- Bit: Jarak 2-3 inci (5-23 cm)
- Brokoli: terpisah 10 inci (25 cm); 5 galon (19L) tanah per tanaman
- Kecambah Brussel: terpisah 10 inci (25 cm); 5 galon (19L) tanah per tanaman
- Kubis: terpisah 10 inci (25 cm); 5 galon (19L) tanah per tanaman
- Wortel: dengan jarak 1-2 inci (2,5-5 cm); wadah dengan kedalaman 6 hingga 8 inci (15-20 cm).
- Kembang kol: terpisah 12 inci (30 cm); 5 galon (19L) tanah per tanaman
- Terong: terpisah 15 inci (38 cm); 5 galon (19L) tanah per tanaman
- Kangkung: Tipiskan hingga 16 inci (41 cm) terpisah
- Selada: Jarak 4-10 (10-25 cm) inci
- Melon: terpisah 15 inci; 5 galon (19L) tanah per tanaman
- Sawi: Tipiskan hingga 4 inci (10 cm) dengan jarak
- Okra: terpisah 20 inci; 5-10 galon (19-38L) tanah per tanaman
- Bawang: Dengan jarak 2-3 inci (5-7,6 cm)
- Peas: 2 inches (5 cm) apart
- Peppers: 8 inches (20 cm) apart; 2½ gallon (9.4L) soil per plant
- Potatoes: 6 inches (15 cm) apart
- Radishes: 1 inch (2.5 cm) apart
- Rhubarb: 12 inches (30 cm) apart; 5 gallon (19L) soil per plant
- Rutabagas: 2 inches (5 cm) apart
- Spinach: Thin to 5 inches (13 cm) apart
- Squash: 12-20 inches apart; 5 gallons (19L) of soil per plant
- Swiss chard: Thin to 8 inches (20 cm) apart
- Tomatoes: ½-5 gallon (2-19L)soil per plant depending on the variety
- Turnips: 6 inches (15 cm) apart
When to plant vegetables in containers
Success in growing vegetables is all about timing—in the garden or in containers.
The temperature has much to do with success growing in containers. Root vegetables are cool-season crops. Leaf and stem crops prefer cool weather. Warm temperatures—and longer days—are needed for fruiting vegetables to grow and mature.
Knowing the average last frost date in spring and the average first frost date in fall will help you plan when to sow seed or set out starts or seedlings—those dates help define the cool-weather crop season and the warm-weather crop season. Mark your calendar with the frost dates, then schedule your planting and harvest. Each crop may have a different start and end date, but a simple calendar will help you keep the garden running smoothly—planting and harvesting.
To make sure you have plenty of time for fruiting crops such as tomatoes, peppers, eggplant, and melons to ripen, you may want to jump-start the season by starting seeds indoors before the last frost.
Lima beans growing in a pot
Container planting and harvest times
Here are suggested seed sowing and harvest times for crops you can grow in containers on a patio, balcony, or rooftop.
- Asian Greens: Plants prefer to grow in cool weather; sow seed in early spring and again in late summer. Some can grow inside during winter under lights or in a windowsill; keep temperatures below 70°F (21°C). Most Asian vegetables require 30 to 50 days to reach harvest—depending on the variety.
- Asparagus: Start with one-year-old plants from a nursery (sold as roots in late winter). Plant roots as soon as the danger of frost is past. Harvest comes in the second year after planting; the plant can remain productive for 20 years.
- Beets: From seed, the crop is ready in 8 to 10 weeks; time sowing so that harvest is complete before or well after the summer heat.
- Beans: Sow seeds in late spring and early summer; beans are cold-sensitive and should not be planted until after the last expected frost. Beans are ready in 60 to 70 days.
- Broccoli: Grow broccoli from seedlings. In cold-winter regions, starts can go into the garden two weeks before the last expected frost. Put in a second planting in midsummer for fall harvest. In mild-winter regions, set out starts from early fall through late winter. Time planting so that the crop matures before it becomes really hot. Broccoli is ready to harvest in 8 to 10 weeks.
- Brussels sprouts: Start from seedlings. Brussels sprouts require four to five months of cool weather to mature or a summer temperature of 65°F (18°C) or less. In hot summer regions start in early summer to mature in cool fall weather. Brussels sprouts are ready for harvest in 2 to 3 months.
- Cabbage: Late winter and early spring plantings should be timed to reach maturity before the arrival of hot summer days. Start crops for fall and winter harvest in mid-summer. Cabbage is ready for harvest in 60 to 110 days depending upon the variety.
- Carrots: Start in spring about the time of the last frost and continue until 60 days before the first frost in fall; with ample moisture, they can be grown in the summer heat. Provide shade where exceptionally hot. Carrots mature in 8 to 12 weeks depending on the variety.
- Cauliflower: Bring cauliflower to harvest in cool weather. From seed to harvest allow 12 weeks; from starts to harvest allow six to eight weeks. In cool spring and early summer regions, start plants in late winter or early spring. In warm spring and summer regions, start from seedlings in mid-summer for a fall harvest.
- Celery: Seeds are very slow to germinate so it’s easier to start with seedlings from the garden center. In mild-winter regions, grow celery for winter harvest. In warm-summer regions, plant celery in late summer for fall harvest. Celery is ready for cutting 16 to 18 weeks after sowing.
- Collards: Sow seed in early spring and summer. From seed to harvest allow eight or nine weeks.
- Corn: Sow seed in late spring after frost danger is past or set out starts two weeks after the last frost; in mild winter regions sow in late summer for a fall crop. Corn is usually ready 65 to 80 days after sowing.
- Cucumbers: Sow after temperatures rise to a constant 60°F (15°C) Make a second sowing one month later. Cucumbers are ready to harvest 50 to 60 days after sowing.
- Eggplant: Start with young plants from a nursery or by seed sown indoors at least two months before you plan to transfer them to outdoor containers. Eggplants are ready for harvest 60 to 75 days after sowing—if days and night temperatures stay consistently warm, 70°F (21°C).
- Garlic: Sow cloves in the fall to harvest large bulbs the following summer. In cold-winter regions protect the crop from freezing by covering and insulating the container.
- Horseradish: Start with root cuttings from established plants after the danger of frost has passed. Horseradish is a perennial; protect the container from freezing in winter.
- Jicama: Start seeds indoors for three months before setting it out in a container after the danger of frost has passed. Jicama requires three months of warm temperatures to reach harvest.
- Kale: If summers are cool with an average daytime temperature of 75°F (24°C) or less sow in spring, otherwise sow in midsummer to grow in the cool of fall. Frost improves the flavor. Kale is ready for harvest in 55 days.
- Leeks: Sow indoors at least two months before the last frost. Starts that are 8 inches/ 20 cm tall can be set out in containers from early to mid-summer and can grow for up to 3 months.
- Lettuce: Sow seed in succession from early spring to fall; seed germinates rapidly but starts can be planted where time is short. Allow 50 to 70 days from seed sowing to harvest.
- Melons: Start seed indoors for 4 to 6 weeks before setting them out in a container. Seed can be planted outdoors after the weather warms to 60°F (15°C). Cantaloupes, honeydews, and watermelons require at least 70 days to come to harvest.
- Okra: Okra loves warm weather; sow seed after nighttime temperatures average 65°F (18°C). Allow 55 days to harvest.
- Bawang: Plant onion sets or seeds in early spring and make successive sowing. Grow for stems in cool weather—below 70°F (21°C)–for bulbs in warm weather. Bulb onions are ready to harvest in 100 to 110 days; shallots are ready to harvest in 60 to 70 days.
- Peas: Start seed indoors or sow outdoors three weeks before the last expected frost. Fall sowing is recommended for areas with mild winters. Peas are ready for harvest in 55 to 70 days.
- Peppers: Sow seed indoors eight weeks before you plan to set plants out; set out transplants after average temperatures reach 60°F (15°C). Sweet peppers are ready for harvest in 70 days; hot peppers require 60 to 100 days depending on the variety.
- Potatoes: Sow seed potatoes in early spring; potatoes are cold tolerant so you can plant them before frost has passed. In mild-winter areas plant potatoes in mid-summer for a winter harvest. Potatoes are ready between 75 and 130 days to harvest.
- Pumpkins: Sow seeds in the container after the danger of frost has passed or set out starts two or three weeks after the last frost. Most varieties require 100 days or more from sowing to harvest.
- Radishes: Sow radishes indoors anytime during the year; outdoors avoid growing in midsummer and sow the last outdoor crop three to four weeks before the last killing frost. Harvest in 25 to 50 days depending on variety.
- Rutabaga: Crop will mature from seed in three months; time sowing so that harvest comes before or after the summer heat.
- Spinach: Sow seed in early spring and early fall for windowsill and outdoor containers. Make successive plantings ten days apart. Temperatures in the 80°sF (26°C) will cause the crop to bolt. Spinach requires 45 to 50 days from sowing to harvest.
- Squash: Sow seed indoors three to four weeks before the last expected frost; set plants out two weeks after all danger of frost has passed. In warm-winter areas start seed in late summer or set out transplants for fall harvest. Zucchini and other summer squashes require 40 to 45 days to reach harvest from sowing; winter squashes require 70 to 100 days depending on the variety.
- Sweet Potatoes: Start from slips outdoors after all danger of frost has passed. The crop requires 100 to 120 days to reach harvest.
- Swiss Chard: Sow in containers year round except where winters are harsh, then sow in late spring. From seed to harvest allow 55 days.
- Tomatillo: Sow seeds indoors a month before the last expected frost. Set out plants two weeks after all danger of frost has passed. From sowing to harvest allow 85 days.
- Tomatoes: Transplant starts to outdoor containers about two weeks after the last frost. Start seed indoors 8 weeks before you plan to transplant to containers outdoors. Tomatoes require 55 to 100 days to reach harvest depending on the variety.
- Turnips: Crop will mature from seed in two months; time sowing to mature crop before or after the summer heat.
Water, weeding, and care
Container plants almost never need weeding, but you will need to water them more frequently. Container soil should be moist to the touch, but never soggy:too much water rots roots. Water immediately after planting to wash potting mix from the foliage, after that, use a watering can with a fine-rose nozzle to water so as not to disturb the planting mix. (If watering indoors, use a kitchen measuring cup.) Another technique is to water from below, by placing the pot in a watering tray and allowing the water to wick up into the pot for an hour or two. It’s best to water early or late in the day so that the rays of the sun do not damage wet leaves. In warm weather be sure to check your containers every day to make sure they are not dry. Water whenever the soil is dry to a depth of 1 inch. Don’t let containers dry out; that will interrupt quick growth which is essential to container vegetable gardening and can cause plants to drop blossoms and fruits.
Whenever you water look for weeds and remove them and trim away any dead leaves or debris and check for insect pests. Most insect pests can be stopped early with a spray of insecticidal soap–a light squeeze of dish soap in a spray bottle. Twice during the growing season give your container vegetables a feeding of compost tea; this should be enough to replenish the nutrients they draw from the soil. At the start of the next season, it’s best to begin again with fresh, nutrient-rich soil.
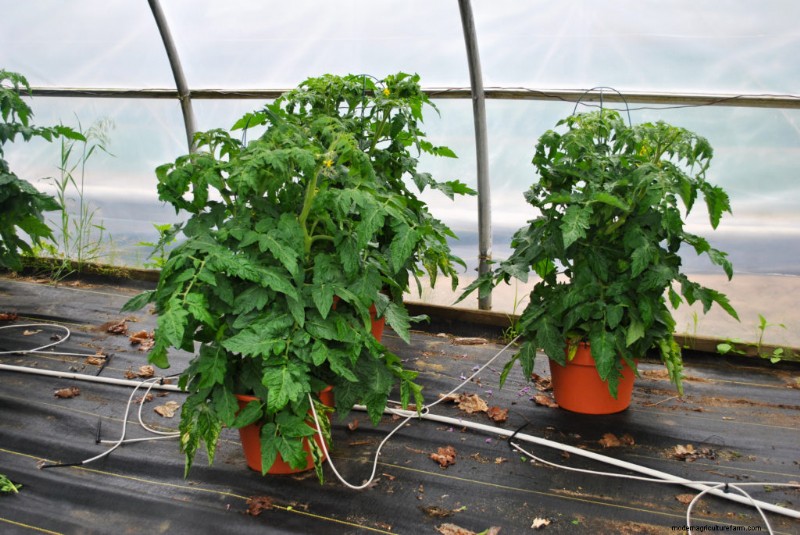
Bush tomatoes in large pots
Care and feeding container vegetable garden crops
Vegetables growing in containers on patios, balconies, or rooftops require special care when it comes to watering and feeding.
Containers have a limited capacity for storing essential nutrients and moisture that ensure plant growth. The gardener must closely monitor container crops to be sure they are growing uninterrupted which, in turn, leads to the best yield and flavor.
Almost all growing crops demand even moisture—that means never letting the soil go completely dry and never overwatering leaving the potting mix soggy. A compost-rich potting mix may supply nearly all the nutrients a crop will need over the length of a season—but feeding with an organic fertilizer may be necessary where containers are small or multiple plants are growing (nutrients are essential).
Use a moisture meter to monitor watering if you have any doubts about how wet or dry your containers are. All garden centers and nurseries will have both dry and liquid organic fertilizers. Ask which fertilizer they recommend and then follow the label directions carefully; it’s always safer to under-fertilize than over-fertilize.
Here are care and feeding suggestions for vegetable growing in containers on a patio, balcony, or rooftop.
- Asparagus: Water every five to seven days during the summer and feed twice a year (early spring and late summer) with a complete liquid fertilizer diluted to half strength. When the leaves begin to brown in autumn cut stems to soil level.
- Beets: Keep the soil just moist throughout the growing season (never over water). Thin seedlings when they are 6 inches tall to stand 3 to 4 inches apart. After thinning, feed once with a complete liquid fertilizer diluted to half strength. Don’t let the soil crust–gently cultivate with a trowel or hand cultivator.
- Beans: Keep the soil just moist as plants develop. Later water deeply. Once plants are a foot tall (30 cm) high, thin to strongest plants and feed keepers with a complete liquid fertilizer diluted to half strength. Feed a second time when pods begin to form.
- Broccoli: Keep soil evenly moist. Feed with a complete fertilizer at full strength twice during the growing season—first when plants are about 8 inches tall and again before heads begin to form. Broccoli is heat sensitive and will bolt and flower when temperatures get into the high 70°Fs (21°C).
- Brussels sprouts: Keep the soil evenly moist water; don’t let it dry out. Feed when sprouts are beginning to form with a complete liquid fertilizer at half strength. As the sprouts begin to cluster, twist off the leaves beneath to transfer growing energy to form more sprouts.
- Cabbage: Keep the soil evenly moist; it must not dry out. Once transplants are established, feed every three weeks until heads begin to form; use high nitrogen, high potassium fertilizer diluted to half strength. Keep soil mounded around the base of the plant to encourage new root development; this will stabilize the plant and hasten maturity.
- Carrots: Keep the soil just moist until harvest. Thin seedlings as they grow to 2 inches between the strongest plants. Feed after the final thinning with a complete liquid fertilizer diluted to half strength; feed again two to three weeks before harvest.
- Cauliflower: Keep the soil evenly moist. The most common problem encountered when growing cauliflower is its failure to set heads. This can be caused by uneven watering or the soil going dry during a heat wave. Feed plants when well-established with a complete fertilizer diluted to half strength and again as curds form. When a head forms, tie the outer leaves up over the head with twine. This will protect the head from the sun and help the curd to blanch.
- Celery: Celery is a bog plant that requires ample, consistent water to thrive. Feed with complete fertilizer diluted to half strength every two weeks. Keep soil mounded up around the base of each plant to stabilize upright growth. Blanch celery quickly by covering the stalks (leaving the top leaves exposed) with a paper bag or opaque plastic seven to ten days before harvest.
- Collards: Keep the soil evenly moist. Mist leaves on hot, dry days. Feed with high nitrogen, and high potassium fertilizer at full strength twice during the growing season.
- Corn: Corn requires eight hours of sun each day to produce the best crop. If full sun is an issue, look for a hybrid suited to your region. Thin plants to 12 inches (30 cm) apart as they mature. Keep the soil evenly moist; don’t let it dry out especially when the weather is hot and dry. Feed with a 5-10-10 fertilizer at full strength every three weeks.
- Cucumbers: Keep the soil evenly moist. Keep the potting mix warm; use black plastic mulch until the weather heats up then switch to aluminum foil; this reflects heat and light under the foliage which discourages aphids. Feed with a high phosphorus fertilizer diluted to half strength when the plant begins to flower and then every other week until harvest.
- Eggplant: Keep the soil evenly moist throughout the growing season; do not let the soil dry out. Feed monthly with a complete fertilizer diluted to half strength. Keep plants in a warm, sunny location. Protect plants on cool nights by covering them with a light plant blanket; cool weather stunts growth and reduces yield.
- Garlic: Keep the soil just moist—not wet. As plants mature make sure containers are in a warm, sunny location.
- Horseradish: Keep the soil mix evenly moist. Feed once during the season with a complete fertilizer at full strength.
- Jicama: Keep the plant in a sunny location for at least six hours each day. Keep the soil evenly moist–never soggy. Feed with a 10-10-10 liquid fertilizer at full strength once during the growing season.
- Kale: Keep the soil just moist. Thin plant to 8 inches (20 cm) apart. Feed with high nitrogen, and high potassium fertilizer at full strength twice during the growing season.
- Leeks: Keep the soil evenly moist–never soggy, which can cause rot. Cool weather will not hurt plants. Blanch leeks by setting a section of 2-inch-diameter opaque plastic tubing or pipe over each one when the stems begin to thicken (mounding with soil is not practical in containers).
- Lettuce: Keep the soil evenly moist but not wet until heads form—too much water can cause rot or head varieties to crack. Feed lightly every two weeks with a complete liquid fertilizer diluted to half-strength. Hot weather can cause non-bolt-resistant varieties to flower. Protect plants from the hot sun with shade cloth.
- Melons: Keep the soil evenly moist; do not let it dry out but be careful not to overwater; overwatering can cause fruit to crack and may reduce sugar content. Keep foliage dry to avoid fungal diseases. Add slow-release 10-10-10 fertilizer into the soil after vines flower; side dress with water-soluble fertilizer a couple of weeks before the first harvest. Melons thrive in warm temperatures. If the weather cools or in short-season regions keep the soil mix warm by covering it with black plastic and positioning containers in direct sun all day. Allow vines to trail or train vines to a trellis if the container is heavy and will not tip. Support trellised melons with netting.
- Okra: Okra grows best in warm weather; sow seed after nighttime temperatures average 65°F (18°C). Keep the soil just moist—never wet.
- Bawang: Keep the soil evenly moist throughout the growing season to ensure good bulb development—but don’t overwater which can cause rot. Onions are heavy feeders and should be given a 5-10-10 liquid fertilizer at full strength twice a month.
- Peas: Keep the soil barely moist. Thin seedlings to 3 inches apart and train climbing types on string netting or wooden trellises when tendrils appear. Feed twice during the growing season with a low nitrogen 5-10-10 liquid fertilizer diluted to half strength (too much nitrogen will stimulate leafy growth at the expense of the pods).
- Peppers: Keep the soil evenly moist but not wet throughout the season and particularly during fruit development. Feed with a complete fertilizer diluted to half strength when plants are well established and once more just before blossoms open. Peppers grow best when night temperatures do not dip below 68°F (20°C) at night and stay between 75-80°F (24-26°C) during the day. Use a floating row cover or shade cloth to protect the fruit from sunscald if the weather turns hot (over 90°F/ 32°C).
- Potatoes: Grow potatoes in a sunny location. Keep the soil evenly moist; drought and drench cycles create deformed tubers.
- Pumpkins: Keep the soil evenly moist and do not let it dry out for best fruit development. Avoid wetting leaves which can lead to fungal diseases. Feed after blooming with a 10-10-10 fertilizer at full strength.
- Radishes: Keep the soil evenly; do not let it dry out—but don’t let it get soggy. Thin to strongest seedlings, 3 inches apart. Feed with a 10-10-10 liquid fertilizer, diluted to half strength. One feeding per crop is all that is needed.
- Rutabaga: Keep soil evenly moist throughout the growing season. Thin established seedlings 6 to 8 inches (15-20 cm) apart. Feed one week after thinning and again three weeks after thinning—with a complete liquid fertilizer diluted to half strength.
- Spinach: Keep soil evenly moist throughout the growing season. Once plants are well-established begin feeding with a high nitrogen fertilizer diluted to half strength every two weeks. When plants are 3 to 4 inches (7-10 cm) tall, and thin so the remaining seedlings are 6 inches (15 cm) apart.
- Squash: Keep potting mix evenly moist; keep water off foliage that is susceptible to mildew. Grow squash in a bright sunny place for the best yield. Place black plastic sheeting around the base of plants early in the season to conserve moisture and warm plants; later use aluminum foil to conserve moisture and repel insects with bright reflected light under leaves. Feed with a 10-10-10 fertilizer after fruit sets.
- Sweet Potatoes: Once transplants are established, keep the potting mix just moist—never wet. A month after setting in slips, sprinkle a 10-10-10 slow-release fertilizer into the soil avoiding contact with the stems.
- Swiss Chard: Keep the soil evenly moist throughout the growing season; too little water will cause the leaves to be stiff and coarse. Thin seedlings when 2 to 3 inches (5-7 cm) tall to 6 inches (15 cm) apart. Feed with a complete liquid fertilizer every two weeks once plants are established.
- Tomatillo: Be sure plants get a full day of direct sun. Keep the potting mix just moist throughout the growing season.
- Tomatoes:Keep the soil just moist throughout the growing season; do not let it go dry out and do not overwater (a dry-wet cycle can cause cracking or blossom-end rot). Feed with low nitrogen, high phosphorus food once a month while fruits are developing. Just before harvest stop feeding. Plants sheltered from the wind should get a gentle shake during flowering (this will help ensure pollen drop from the anther onto the stigma—the tomato has a complete flower that self-pollinates).
- Turnips: Keep soil evenly moist throughout the growing season. Thin established seedlings 6 to 8 inches (15-20 cm) apart. Feed one week after thinning and again three weeks after thinning—with a complete liquid fertilizer diluted to half strength.
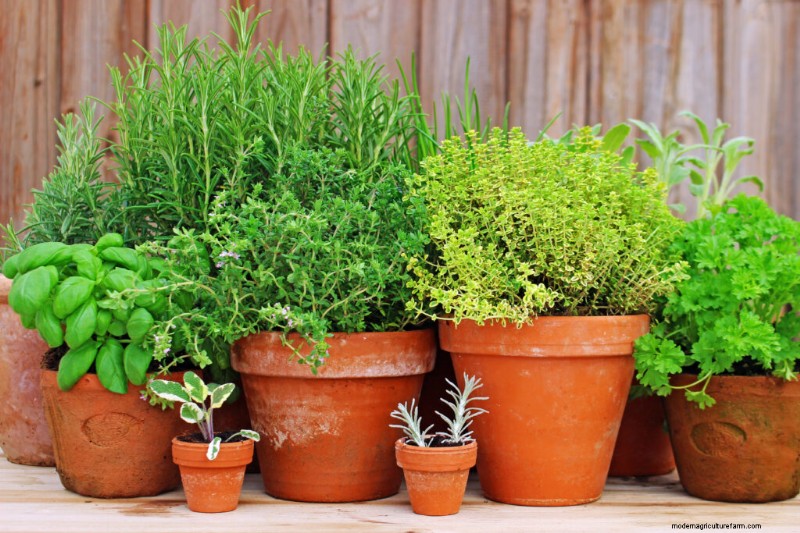
Herbs growing in clay pots
Water-wise crops for containers
Crops that are relatively drought tolerant are best for containers or gardens where water is not easily accessible. Water-wise crops are a good choice for balconies, rooftops, and patios.
All crops need water to grow—especially when first planted and until they are well-established. The best course is to keep the soil just moist—not too wet and not dry whenever possible.
Water pots less than 8 inches (20 cm) in diameter from above; use a 1-quart kitchen measuring cup. Large pots can be watered with a plastic pail, watering can, or a gentle stream from a hose.
Let the soil in a pot or container dry out to 1 inch (2.5 cm) deep before watering again. Infrequent watering is better than watering too often but never let the soil in a container go completely dry.
If you have a large number of pots, a drip irrigation system that hooks up to a faucet or spigot may be the most efficient course.
Water-wise crops include:
- Artichokes
- Beets
- Carrots
- Chard
- Garlic
- Herbs—bay, lemon verbena, oregano, rosemary, sage, thyme
- Kale
- Peas
- Scallions
- Spinach
Where water is scarce or not easily accessible, avoid these very thirsty crops:potatoes, strawberries, tomatoes, eggplants, peppers, cucumbers, and zucchini.
Planting combinations
You don’t have to grow just one vegetable in a container. Edible flowers such as pot marigolds and violas can be grown with lettuce. Grow leaf lettuce with parsley, chives, and coriander. Lettuce, onions, beets, and garlic can be grown in a large container with broad beans. Small-fruiting peppers such as ‘Tabasco’ or ‘Serrano’ will make a colorful patio container. Grow tomatoes and basil or thyme together. Ruby chard in its own pot is a colorful accent for any deck.
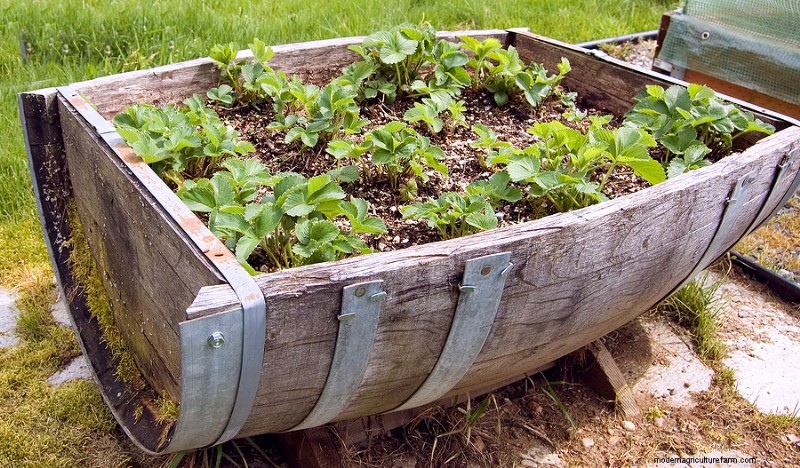
Growing strawberries in a half barrel
Keep your container garden growing
For an extended harvest, make small sowings of different vegetables every three to four weeks during the growing season. Leafy crops can be harvested cut and come again every couple of weeks. To extend the tomato harvest plant two patio varieties a month apart. When the weather turns cold, your container crops can be moved to a warmer location or you can use large clear plastic bags draped over wire frames to form mini-greenhouses that will keep plants growing several weeks after the first frost in autumn. Most vegetables will not grow in the house over the winter; they require a special combination of heat, sunshine, and humidity that is best found in a greenhouse or cold frame. But herbs can be grown indoors over the winter. Expose herbs to gradually warmer temperatures on a porch or in the garage before bringing them into the house for the winter. Herbs can be placed in a sunny window to be enjoyed almost indefinitely.
Juga menarik:
Windowsill Gardening
Garden Planning Books at Amazon:
- Almanak &Perencana Kebun Sayur
- Ensiklopedia Sayuran Panduan Penanam Kebun Dapur
- Panduan Penanam Kebun Sayur
- Buku Jawaban Penanam Tomat